
This is a recipe for flavourful, savoury Curried Turkey Buns using ground turkey, onions and spices, enveloped by a soft and fluffy sweet bun.
Disclosure: This post is sponsored by the Turkey Farmers of Canada. All images and opinions expressed are solely my own.
Want to save this recipe? Enter your email & I'll send it to your inbox. Plus, get great new recipes from me every week!
The other day, I had an intense craving for savoury Chinese-style bakery buns.
Since I didn't want to venture outside, I decided to use what I had on hand, which was lean ground turkey.
I always have packs of ground turkey on hand since our Costco sells them in a huge pack.
I love the versatility of turkey -- from meatballs, to banh mi sandwiches, and everything in between, I can transform the flavour of turkey with a few simple spices. Like these Curried Turkey Buns.

I've once again, partnered with the Turkey Farmers of Canada to present another delicious recipe utilizing turkey.
This recipe draws inspiration from the Chinese bakery classic, curry beef buns.
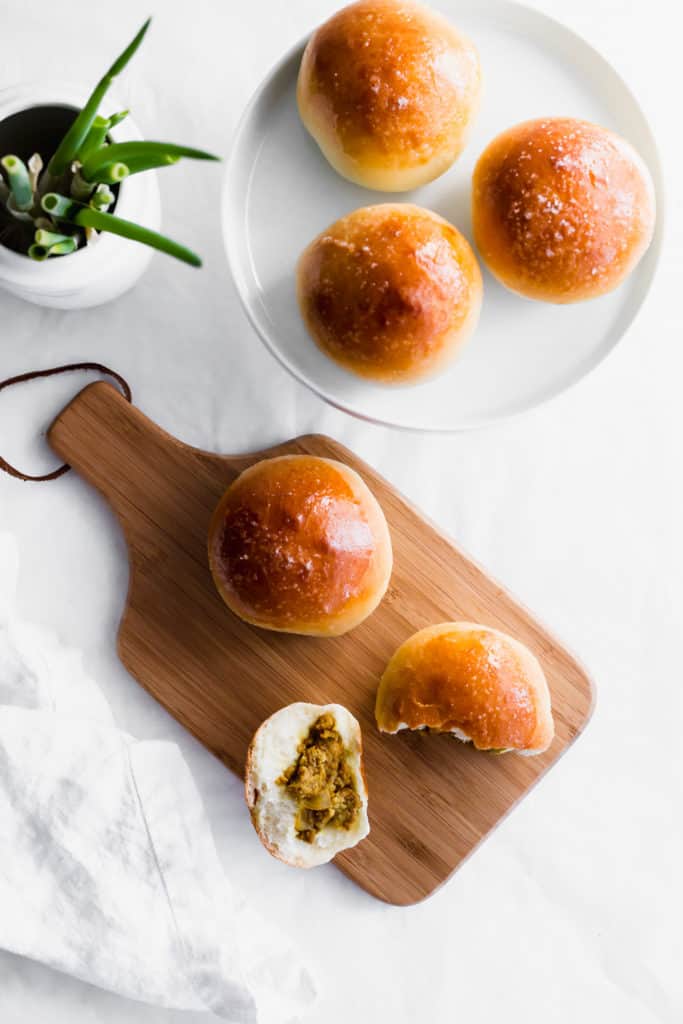
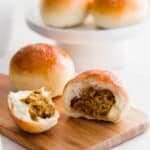
Soft, fluffy buns envelope flavourful turkey that has been cooked together with fragrant curry powder, onions and aromatics to create a delicious and harmonious bite.
How to make curried turkey buns
This recipe has 2 parts: the curried turkey filling and the dough.
It's a good idea to separate the workload and make the filling the day ahead. That also gives the flavours in the filling to meld together, and chill, which makes it easier to portion.
Just a note: the curried turkey filling makes enough for 2 batches of the dough, so you'll have enough for leftovers (goes well with rice!).
How to make the curried turkey filling
- Chop up the aromatics (onions, garlic)
- Sauté the onions and garlic until fragrant
- Add in the lean ground turkey
- Add in curry powder and simmer
Tips on making the dough
- Use a scale for accurate measurement
- Make the tangzhong (water roux) in a small saucepan and leave it to cool
- Ensure the milk is warmed to about 105°F-115°F in order to activate the dry yeast
- Knead the dough until it is shiny and smooth
- Don't be tempted to add in more flour or water -- with enough kneading, the gluten starts to activate and the dough will come together
Putting the buns together
The dough is rolled out into circles and the filling is added to the middle.
Pinch the seams and repeat.
Once baked, the soft fluffy buns get a brush of sugar-water glaze to give it shine and extra sweetness.
This buns will stay fresh and soft for a few days at room temperature, but if you're not going to be consuming them right away, it's best to keep them in the fridge.
Other recipes you may like
Be sure to try out these recipes:
Five-Spice Turkey Green Onion Pancake Rolls
Let me know if you try out this recipe -- I love seeing your creations! Tag me on Instagram @siftandsimmer or leave me a comment/rating below.


Curried Turkey Buns
For accuracy and precision in baking recipes, use weight (metric) measurements when available.
Ingredients
Curried Turkey Filling:
- 2 tablespoon avocado oil
- 1 large yellow onion chopped
- 3 cloves garlic minced
- 1 ½ lb lean ground turkey
- 4 tablespoon curry powder
- 2 tablespoon granulated cane sugar
- ½ teaspoon sea salt
- 3 tablespoon soy sauce
- 2 tablespoon corn starch
- ½ cup poultry stock or cold water
Dough:
Tangzhong: (water roux)
- 3 tablespoon all-purpose flour
- ½ cup water
Dough:
- ¾ cup whole milk lukewarm
- 1 tablespoon granulated cane sugar
- 1 teaspoon active dry yeast
- 3 cups all-purpose flour
- 1 large egg save some for eggwash
- 1 tablespoon avocado oil
- ½ teaspoon sea salt
Glaze:
- 1 tablespoon granulated sugar
- 1 tablespoon hot water
Instructions
Curried Turkey Filling: (Make a day ahead)
- Heat a large heavy-bottomed pot over medium high heat. Add in the oil, onions and garlic. Saute the onions and garlic for about 5-8 minutes, until softened and translucent.
- Next, add in the ground turkey. Using a wooden spoon, break up the chunks of turkey and continue to stir with the onions and garlic, until the turkey is no longer pink and cooked through.
- Add in the curry powder and incorporate it into the turkey evenly. Lower the heat. Sprinkle in the sugar, sea salt; add soy sauce and continue stirring.
- Dissolve 2 tablespoon cornstarch into the ½ C poultry stock or water. Mix well and pour it over the turkey mixture. Turn up the heat to medium and keep stirring. The turkey mixture will thicken up with a shiny sauce. If it's too dry, add in a little water to loosen.
- Taste (and adjust) for seasoning and remove from heat. Let cool and place into the fridge.
- On the day you'll make the buns, portion out approximately 30g of filling for each bun. (I use a small ice cream scoop to portion out the filling and place onto a plate). Leave the filling out at room temperature.
Dough:
Make the tangzhong:
- In a small saucepot, add in flour and water. Whisk over low-medium heat for about 5 minutes, until thickened, like a paste. Remove from heat and let cool to room temperature.
Make the dough:
- Pour the warmed milk into a bowl, add in the sugar and yeast. Give it a stir and let the yeast activate and bubble.
- In a bowl of a stand mixer fitted with a dough hook, add in the flour, about 75% of the egg (remember to save some for the eggwash later), oil and sea salt. Start the mixer on low and pour in the activated yeast and milk. Add in the cooled tangzhong.
- Knead until the dough starts to come together and forms a smooth and shiny ball, about 7-8 minutes of kneading.
- Put the dough into a lightly greased bowl and cover with plastic wrap. Place in a warm location and let the dough double in size (approximately 90 mins, depending on how warm your kitchen is).
- Prepare a baking sheet with parchment paper. Set aside.
- Once the dough has risen, deflate the dough and divide in 16 equal portions, about 50g each.
- Roll each portion of dough with a rolling pin into a circle, leaving the centre slightly raised.
- Add the portioned curried turkey filling (about 30g) to the centre of the dough and gather the dough up around the filling, pinching the seams.
- Shape the bun and place onto the baking sheet and repeat with the remainder.
- Preheat oven to 375°F/191°C.
- Cover the buns loosely with plastic wrap and leave to rise until slightly puffy, about 20-30 minutes.
- Brush the tops of each bun with the leftover beaten egg.
- Bake at 375°F/191°C for 20-22 minutes, until golden in colour.
- In a small bowl, add in the sugar and hot water to make the glaze. Once the buns are done baking, remove from the oven and brush with the sugar glaze. Turn the oven off and place the buns back into the oven for 2 minutes.
- Remove the buns and let cool. Best served fresh.
- Store cooled buns in an airtight container and place into the refrigerator.
Notes
Nutrition
The nutritional information provided should be considered as approximate and is not guaranteed. Please use your best judgment to ensure food is safely prepared and/or a good fit for your diet.


Linsey
These buns taste so delicious with the curry flavour. And the buns are very soft. Great for dinner! Thank you Michelle!