Want to save this recipe?
Enter your email & I'll send it to your inbox. Plus, get great new recipes from me every week!
There's something about lava flow -- it's memorizing -- the oozing, flowing... kind of in the same way how people (like myself) get super excited about runny egg yolk. Yes, drippy soft-boiled egg all the way for me!
Now for some real talk: I am not the biggest fan of cheese. I have a (weird) stipulation when it comes to it -- in order for me to eat it, it has to be in its melted form. For example: grilled cheese, tuna melts, or pizza. No cheese and crackers for this girl!
You're probably wondering what does lava and cheese have anything to do with each other?!

MY INSPIRATION FROM TORONTO
The first time I tasted a cheese tart was from Bake Code in Toronto.
My hubby was in Toronto for business and brought back some baked goodies. (Side note: their matcha creme patisserie croissant is soooo good!)
I wasn't sure what to expect, since with the word "cheese" in the title, I imagined it would be savoury.
3 CHEESES USED
But, I was pleasantly surprised -- the cheese tart was slightly sweet and savoury at the same time. They use a combination of 3 different types of cheese:
- cream cheese
- marscarpone cheese
- parmesan cheese
It's based on the Hokkaido Cheese tart, made famous in Japan by Pablo and Uncle Tetsu, among others, but since Hokkaido dairy isn't available on this side of the world, the substitution for the different cheeses is generally used.
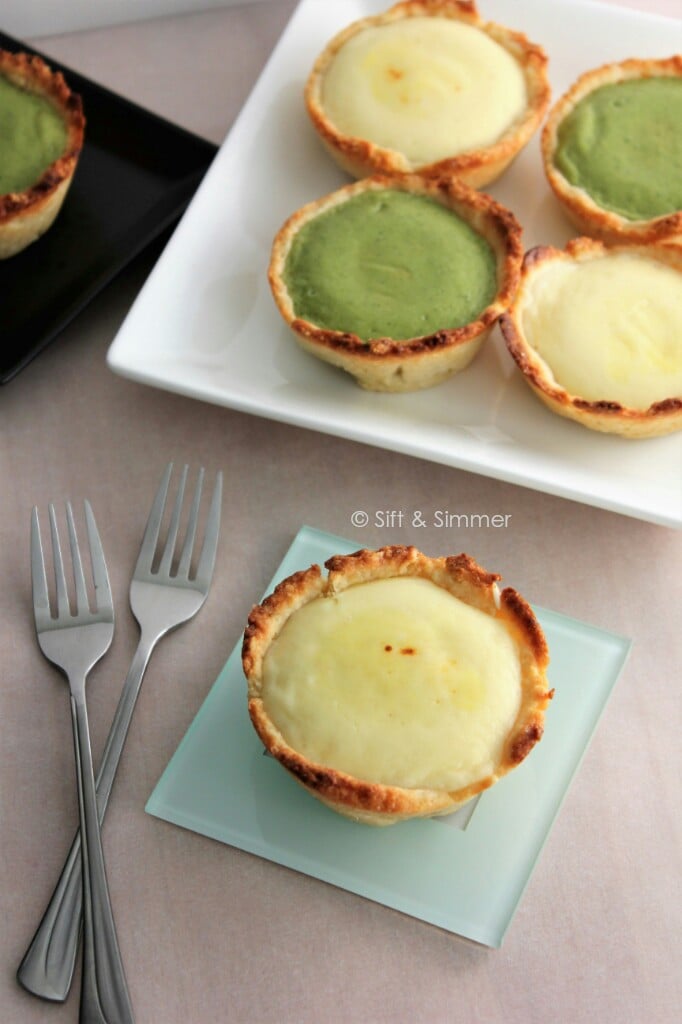
 Bake Code's Twice Baked Rare Cheese Tart, chilled (above)
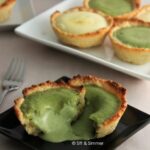
My Molten Lava Cheese Tart, fresh from the oven (below)
Inspired, I wanted to recreate the molten lava cheese tart at home, with a matcha twist. Of course, you can omit the matcha and leave it as a regular cheese tart as well.


MY VERSION OF MATCHA CHEESE TART
This recipe for Matcha Molten Lava Cheese Tart is straightforward and only uses 1 type of cheese: cream cheese, which is readily available in supermarkets over here.
The lightly sweet, luscious, smooth, and creamy filling oozes when it's eaten fresh and warm out of the oven.
When chilled, the filling turns into a rich custard-like texture. Paired with the crunchy, short-crust pastry -- these cheese tarts will have you coming back for more.
My kids inhaled the cheese tarts and begged me to make more. That's saying a lot! Even if you're not a cheese connoisseur (like me), you'll enjoy the taste of these oozing, luxurious Matcha Molten Lava Cheese tarts.
OTHER MATCHA RECIPES
Try making them and let me know in the comments or tag me @siftandsimmer on Instagram.
And if you're looking for more matcha treats, check out:

Matcha Molten Lava Cheese Tart
For accuracy and precision in baking recipes, use weight (metric) measurements when available.
Ingredients
Pastry:
- 100 g all-purpose flour
- 30 g granulated sugar
- 50 g cold salted butter cut into small cubes
- 1 egg yolk beaten
- 3 tablespoon whole milk
Filling:
- 1 tablespoon high-quality matcha sifted
- 60 g icing sugar
- 6 g corn starch
- 2 tablespoon whole milk
- 40 g beaten egg
- ½ tablespoon lemon juice
- 1 teaspoon vanilla extract
- 100 g cream cheese
- 18 g unsalted butter
- 60 ml whole milk
Egg wash:
- leftover from egg not used in the filling
Instructions
Make the pastry:
- In a small bowl, combine together flour and sugar. Cut in the cold butter to the flour and sugar using a pastry blender or use your fingers to rub the flour and butter together.
- Next, add the beaten egg yolk and milk and combine until the mixture forms a dough. Flatten into a disc and seal with plastic wrap.
- Place the dough into the fridge for at least 1 hour.
- After chilling, lightly dust the dough with some flour and use a rolling pin to roll out the pastry on a clean non-stick surface.
- Use a large round cookie cutter (or wide-mouth mason glass jar lid) to cut out rounds.
- Place the cut out rounds into the well of a muffin tin and gently press down and up the sides to form the tart shell.
- Use a fork to lightly pick the bottoms of the shell. Return the muffin tin to the freezer to chill for 1 hour. This prevents the shells from shrinking when baking.
- Preheat oven to 400°F/204°C.
- Place a small piece of scrunched up parchment over top of each muffin tin well and place some pie weights in each well. (I used dried chickpeas but you can use any dried beans as well if you don't have pie weights).
- Bake at 400°F/204°C for 10-12 minutes, or until the pastry is firm and lightly golden.
- Remove the muffin tin from the oven and place on a wire rack to cool for about 15 minutes. Gently remove the tart shells and leave them to cool completely. You can use a toothpick to assist in removing the tart shells.
Make the filling:
- Combine matcha, icing sugar, corn starch and milk in a small bowl and mix. Set aside.
- In another bowl, whisk together egg, vanilla, and lemon juice until combined. Set aside.
- In a medium-sized heat-safe bowl, add the cream cheese, butter, milk and place it over a double-boiler (or a saucepan with simmering hot water over low-medium heat). Whisk until everything is melted into liquid consistency.
- Next, add the matcha, corn starch and icing sugar mixture and continue whisking over low heat.
- While whisking the cream cheese mixture, gradually add in the egg mixture. Keep whisking. (We don't want scrambled eggs). Continue to whisk for another 15-20 minutes over low heat until the mixture thickens a bit and isn't too runny.
- Note: The filling will continue to thicken up a little when it has cooled.
Assemble:
- Increase oven temperature to 450°F/232°C.
- Place the tart shells on a baking tray lined with baking paper. Spoon or pipe enough filing (about 3 Tbsp) into each shell but be careful not to overfill.
- Lightly brush the top of the filling with the remaining beaten egg.
- Bake the tarts on the middle rack for 7-8 mins or until the filling forms a nice firm crust.
- Remove from oven and place on wire rack to cool slightly. You may brulee the tops with a blowtorch for a more caramelized look.
Nutrition
The nutritional information provided should be considered as approximate and is not guaranteed. Please use your best judgment to ensure food is safely prepared and/or a good fit for your diet.
Recipe adapted from Bake For Happy Kids


R
Wow! I'm sure the kids wanted more! Especially green oozing cheese LOL!
Feli
A super simple and easy to follow recipe for a delicious treat. Yum! Thanks for sharing this recipe.
Michelle
Amazing, thanks so much Feli! 🙂
Jessie
Lovely recipe!! Im just wondering how long and how can we store the tarts? Cause I don’t usually have time so I tend to bake a lot and then freeze or store it in the fridge. Thank youuu 😍
Michelle
Thank you Jessie. You can store the tarts in an airtight container in the fridge for up to 5 days. I haven't tried freezing the tarts yet but if you bake the tart completely so the filling it set, it should be OK to freeze. Report back if you try it out!